
How to take aesthetic photos on your phone
"Aesthetic" photos mostly come down to composition: where things sit in the frame, what you leave out, and a calm, consistent look. None of it needs a new phone. These seven habits are the ones the guides in Beginner Cam are built on.
1. Pick one subject
Before you tap the shutter, decide what the photo is about: one person, one plate, one building. Then move closer or zoom until the other things stop competing with it. Most photos that look messy have two or three subjects fighting for attention.
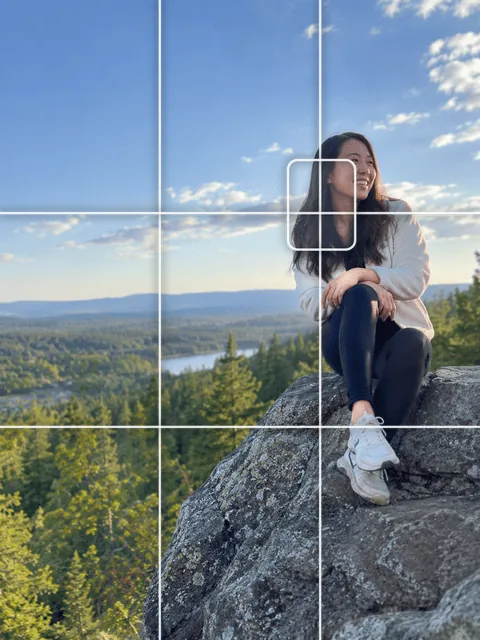
2. Put the subject on a third, not in the middle
Imagine the frame cut into a 3 × 3 grid and place your subject where the lines cross. It leaves room around it and makes the photo feel balanced rather than stiff. Centering works too, on purpose, for symmetry and portraits that look straight at you, but off-center is the easiest upgrade. Full guide: rule of thirds on your phone.

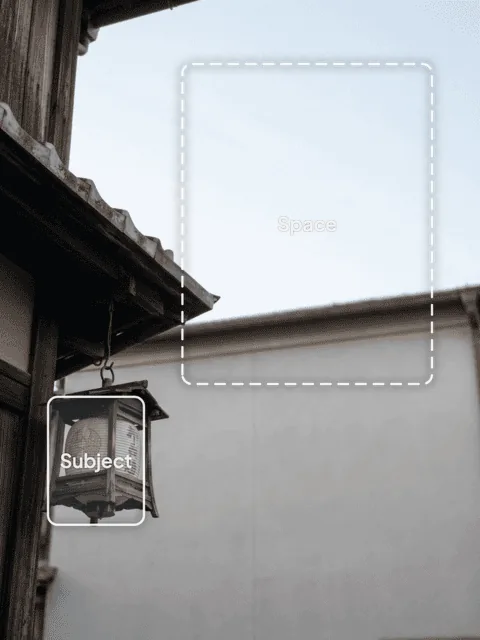
3. Leave empty space
Calm, "aesthetic" photos often have more sky, wall or table than subject. Let one side of the frame stay simple and keep the subject small. Empty space gives the eye somewhere to rest, and it leaves room for text if you post the photo as a story.

4. Keep the horizon straight, and low or high
A tilted horizon is the fastest way to make a photo look accidental. Turn on your camera's level or grid, keep the horizon straight, and put it on the lower third when the sky is the interesting part (or the upper third when the ground is).


5. Frame the subject with something in the scene
Doorways, windows, arches and branches make a natural frame and add depth. Step back until the frame surrounds your subject, and keep the frame's edges straight.


6. Shoot food and flat things from straight above
Plates, desks and flat lays look tidy when the phone is flat and parallel to the table. Hold it level above the center and fill the frame with the plate. More in food photography on your phone.


7. Use soft light and one look for the whole set
Window light and the golden hour before sunset are soft and flattering; harsh midday sun and mixed lights are not. When you edit, use the same filter or look on every photo you post together, so your feed reads as one set rather than many moods.
Practice with a guide
The quickest way to build these habits is to see the lines while you shoot. Your phone's grid helps with thirds and horizons. Beginner Cam goes further: you pick what you are shooting (people, food, scenery, city, pets, cafes, concerts or camping) and it draws the matching guide on the live camera, with an example photo for each. The composition cheat sheet shows all 30 guides on one page.